Inmate Messaging℠
Overview
Using the Inmate Messaging℠ module, you can perform two tasks:
- Create and leave a voice message for recipients by Site, Housing unit, and/or Inmate.
- View message records for voicemail messages left for a specified inmate by an ENFORCER® user, the ENFORCER® itself, or an outside calling party with a Prepaid Collect calling account. Additionally, you can listen to recordings for all these voice message types.
When you create a message using the Inmate Messaging℠ module, The ENFORCER® utilizes a special text-to-voice conversion application that converts your entered text into a synthesized voice message. This message is then posted to the voicemailbox of all inmates you specified to receive the message. Inmates can then listen to and manage their messages like a personal voicemail.
After you have sent a message, all defined recipients are notified through The ENFORCER® IVR Calling Menu that they have an unread voicemail message. This notification occurs the next time an inmate attempts to place a call through The ENFORCER® IVR, and the inmate is prompted with the option to listen to the message. To view a call flow diagram for an Inmate Voicemail call, click here.
To use the Inmate Messaging℠ module, you must be set up with permission from your ENFORCER® Site Administrator. Typically, the user who is set up to use this feature is the same person who handles inmate administrative tasks for the facility.
The Inmate Messaging℠ module is useful for communicating several types of broadcast or inmate-specific information, including:
- Notifying inmates of a scheduling change, such as a change in visiting hours or dining schedule.
- Notifying inmates of a policy change or restriction.
- Notifying inmates that a special privilege, such as additional free inmate calls or visits, has been granted.
- Notifying an inmate that a requested attorney phone number or PAN has been approved.
- Notifying an inmate of a specific appointment or upcoming action, such as a transfer.
- Conveying a message left by an outside caller to the facility operator for an inmate.
- Documenting the proof of delivery of a message to the inmate.
- (Optional) If your agency has The Visitor™, Inmate Messaging is also used to notify inmates when a visit is scheduled or cancelled.
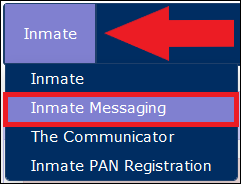
If activated at your facility, the Inmate Messaging℠ module is accessible by selecting Inmate Messaging℠ under the Inmate tab.

Creating and Sending a Voice Message
When you select Inmate Messaging℠, The ENFORCER® displays the Inmate Messaging℠ search page. Click Create New Message on this page to create a new message.

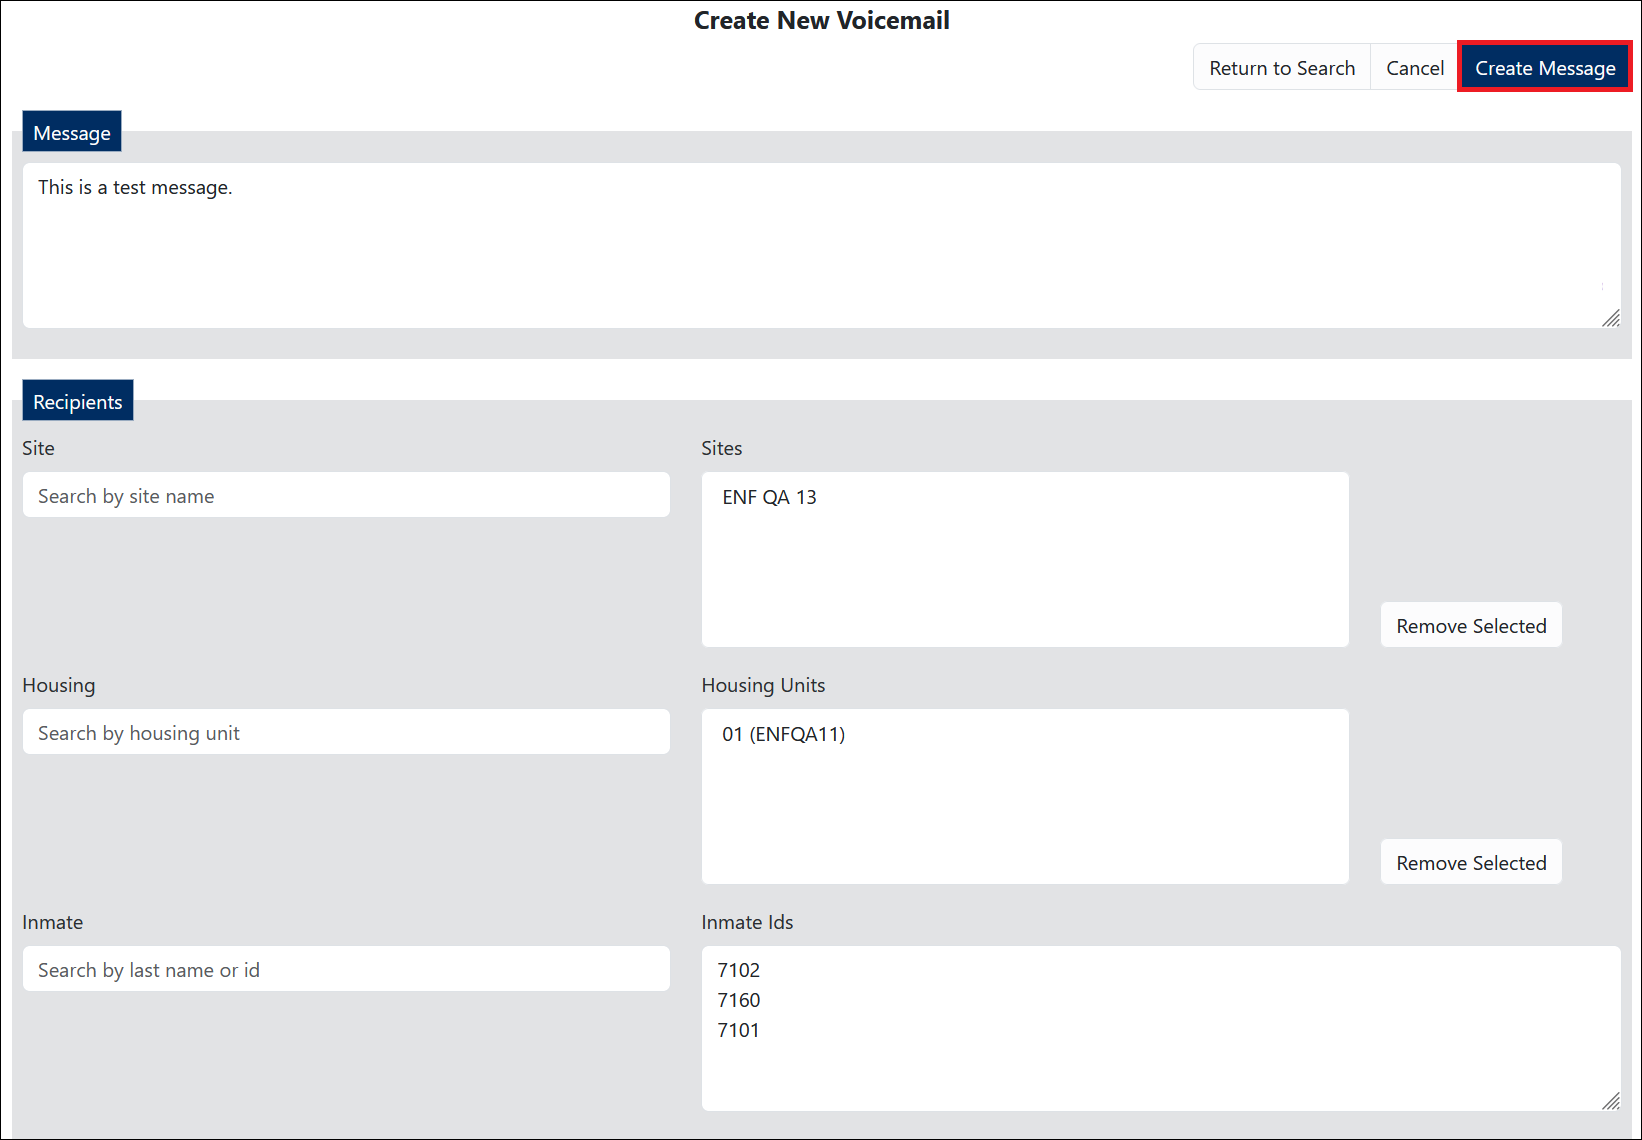
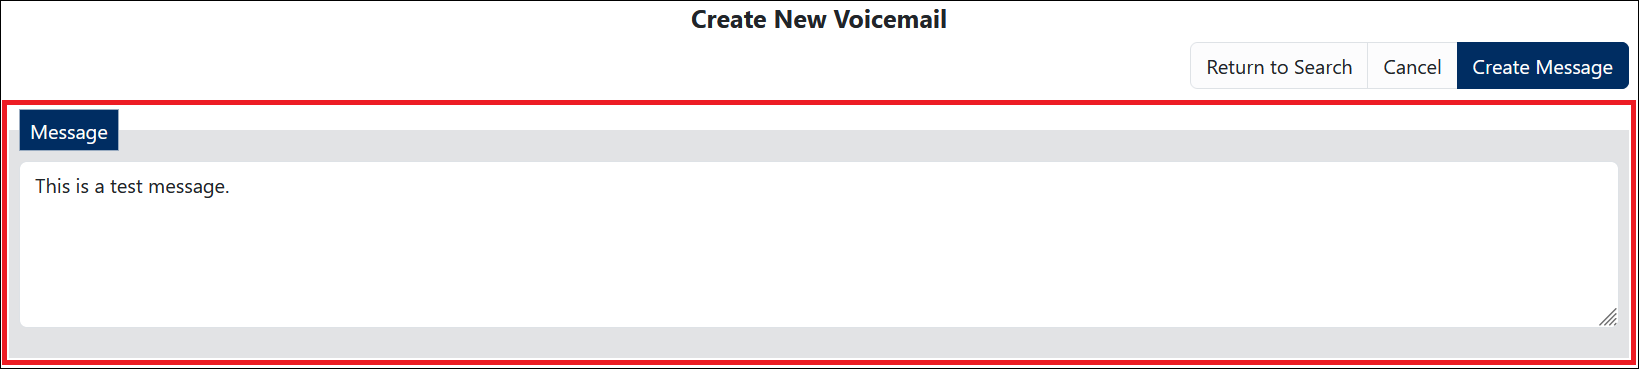
After you click Create New Message, the Create New Voicemail page is displayed, where you can compose a message, define a list of recipients, and submit the message.
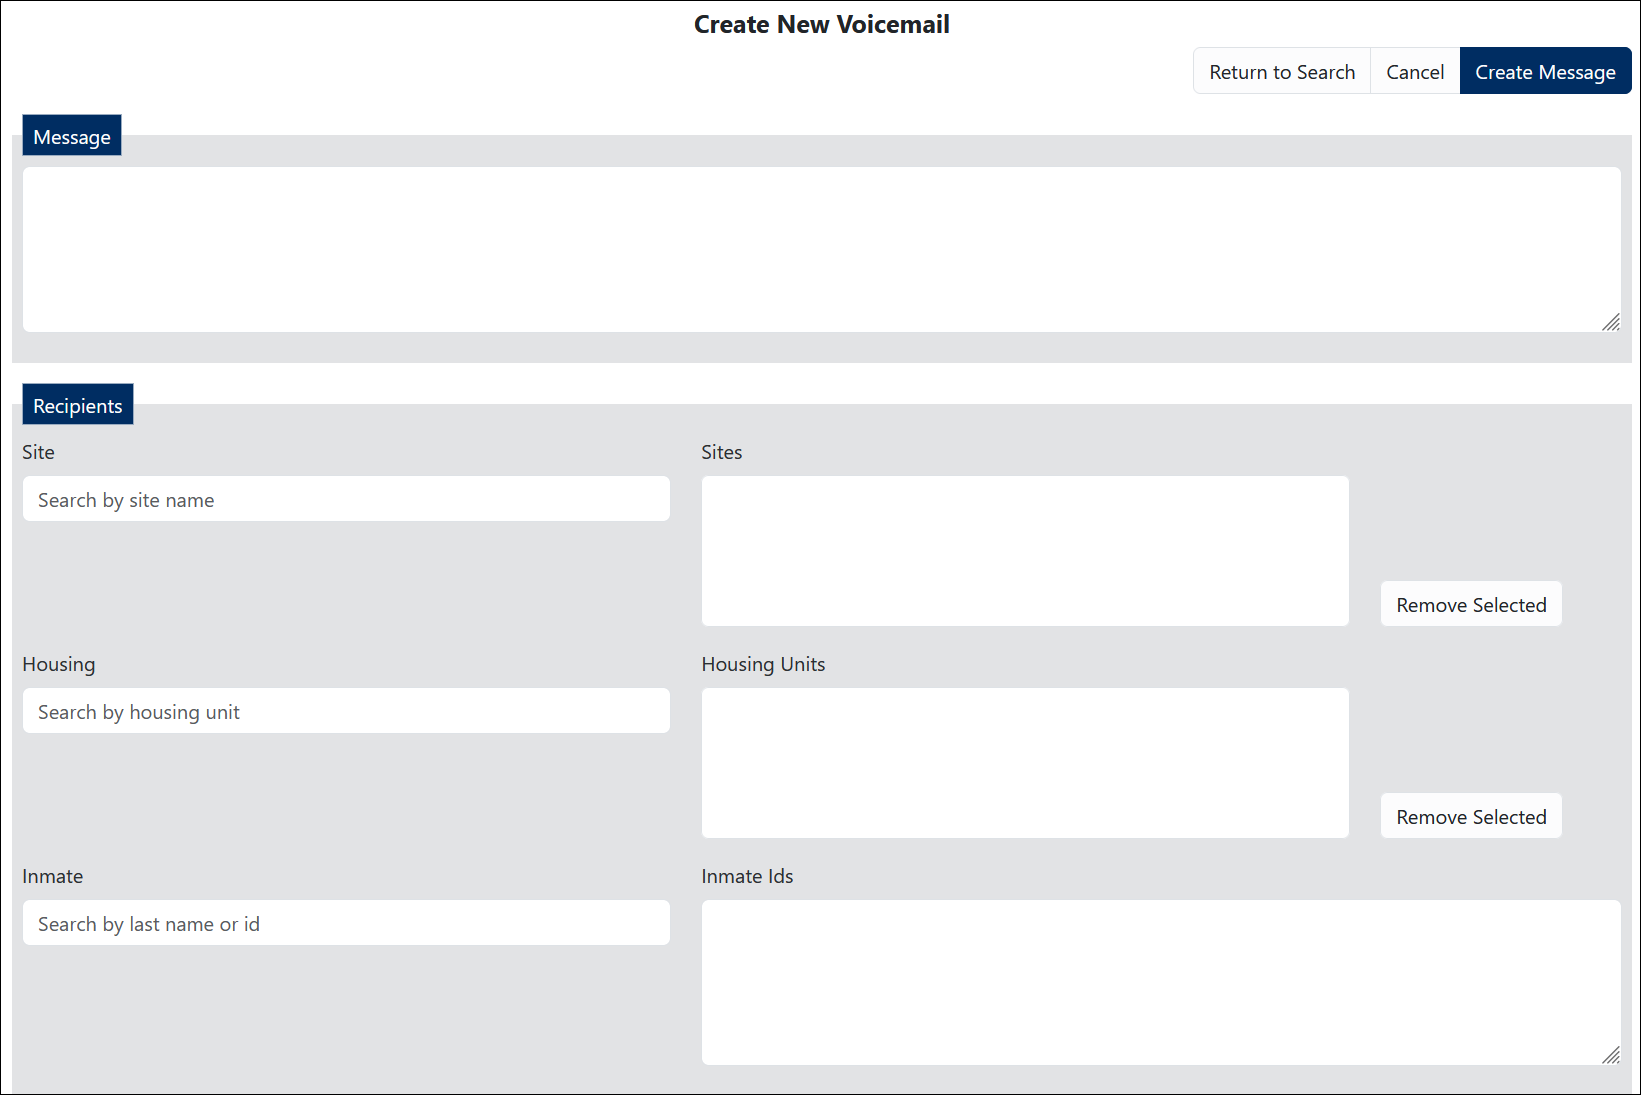
The following example shows a completed message screen before the user clicks Create Message to create the voicemail.
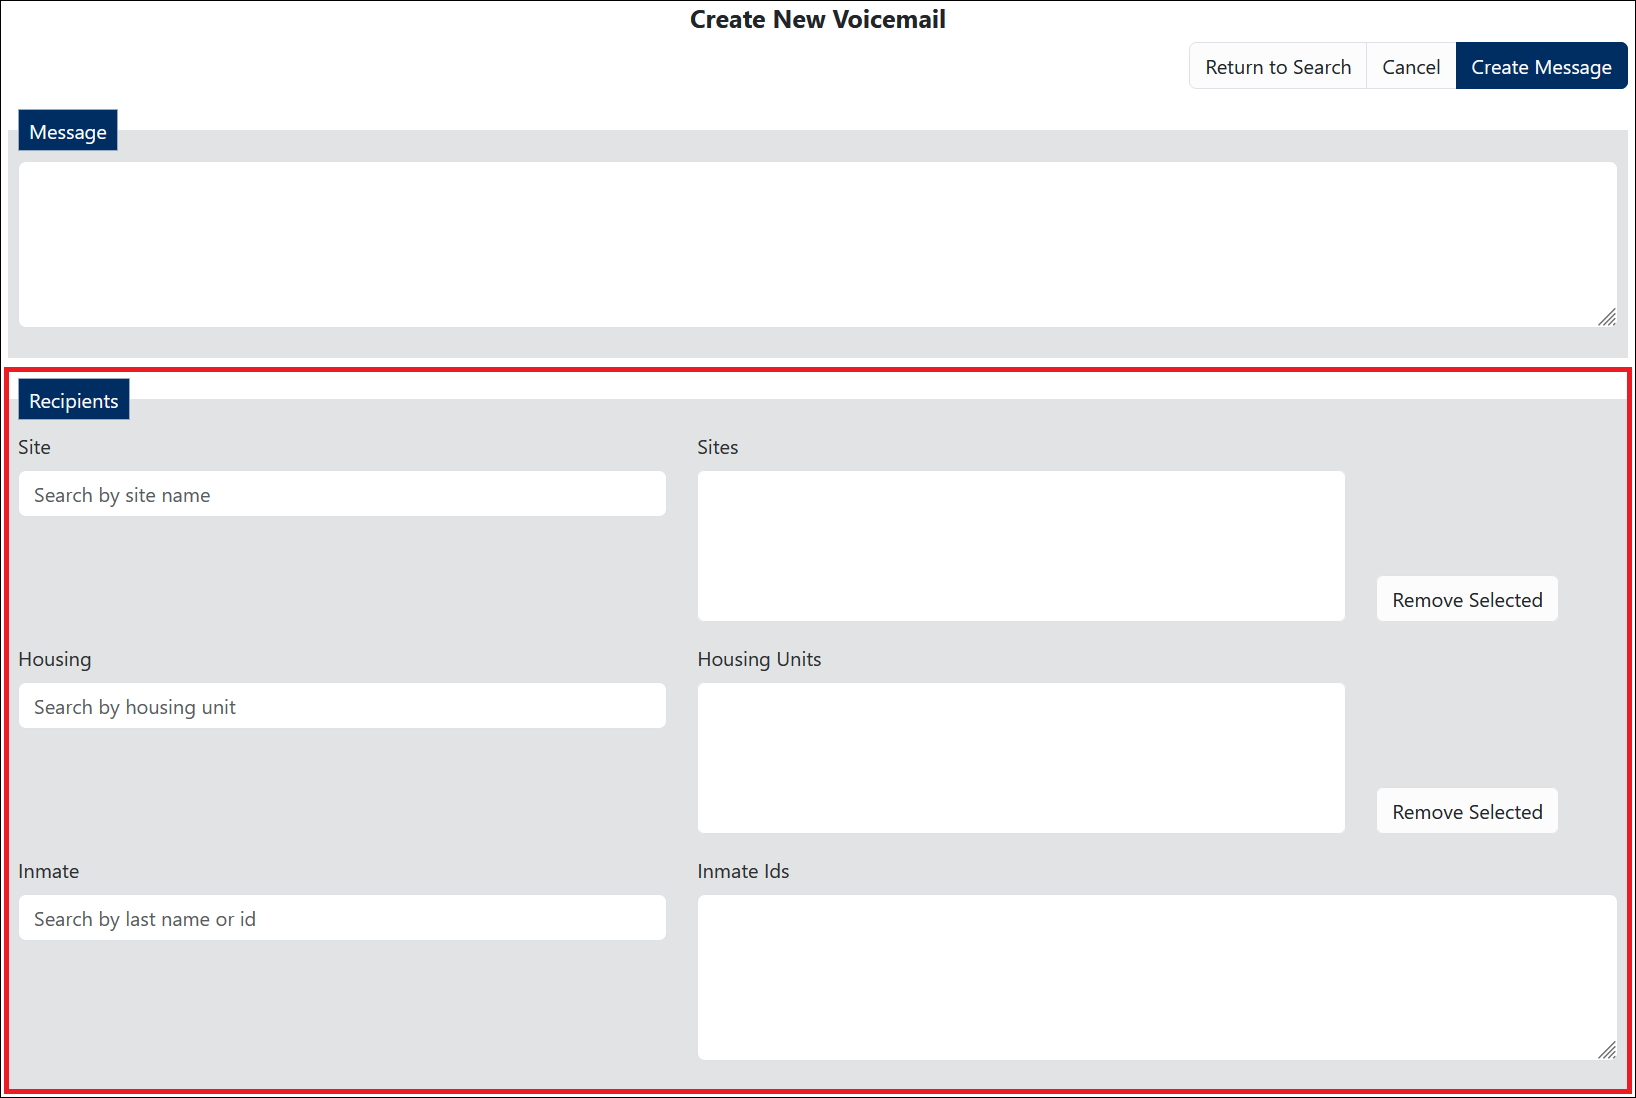
Selecting Recipients for an Inmate Message
When creating a new message, you can send it to all inmates at one or more sites (at multi-site agencies only), all inmates in one or more housing units, or one or more specific inmates. Use the Recipients pane to select recipients for an inmate message.
To accommodate requests for all inmates at either a site or a housing unit, The ENFORCER® collects this information from the site or housing unit as defined on each inmate'sInmate Detail page. For more information, click here.
The Recipients pane offers three options, as shown in the example above. The following sections describe each option.
You can specify any combination of the options described in the following sections. For example, you can send a single message to all inmates at a selected site, all inmates in a housing unit at another site, and one or more selected inmates who are not included in the other two options.
All Inmates at Site
When you begin entering a site name into the Site field, a dropdown list of all the agency sites containing the characters you entered is displayed. After you select a site, the Sites field is populated with its name. Each additional site you choose is added to the recipient list.

For agencies with one site, if the site is selected, it is the equivalent of choosing All Inmates for the agency.
All Inmates in a Housing Unit
Begin entering the housing unit in the Housing field to generate a dropdown list of locations below the field. After you select a location name from the list, the Housing Units box is populated with that location's name. Each additional location you select is added to the recipient list.

Specific Inmates
Begin entering the desired inmate's last name or Inmate ID to generate a dropdown list of inmates whose last names or Inmate IDs contain the characters entered. After you select an inmate, the Inmate Ids field is populated with the inmate’s ID. Each inmate you select from the dropdown list is added to the recipient list.

How to create and send an inmate message
To help ensure the accurate conversion of your typed message, do not use non-standard acronyms, slang words, or text message abbreviations.
- Select Inmate Messaging under the Inmate tab.
- Click Create New Message. This will open a standalone Create New Voicemail page.
- Compose the message you wish to send.
Since you cannot listen to a message to review it before you send it, be sure to proofread your message text and check the accuracy of your recipient list.
- Select the Recipients of the message. You may select recipients by Site, Housing unit, and/or Inmate.
By Site(s):
✔ Begin entering the site name and select the desired site(s) from the list.

✔ To remove one or more sites from the Recipients list, select the site(s) you wish to remove, then click Remove Selected.

By Housing unit(s):
✔ Begin entering the housing unit name and select the desired unit(s) from the list.

✔ To remove one or more housing units from the Recipients list, select the unit(s) you wish to remove then click Remove Selected.

By Inmate(s):
✔ Begin entering the Inmate name or ID and select the desired Inmate(s) from the list.

✔ To remove one or more Inmates from the Recipients list, highlight the Inmate(s) you wish to remove using your mouse pointer, then press Backspace or Delete on your keyboard.

- After you have composed your message and selected the desired recipient(s), click Create Message.
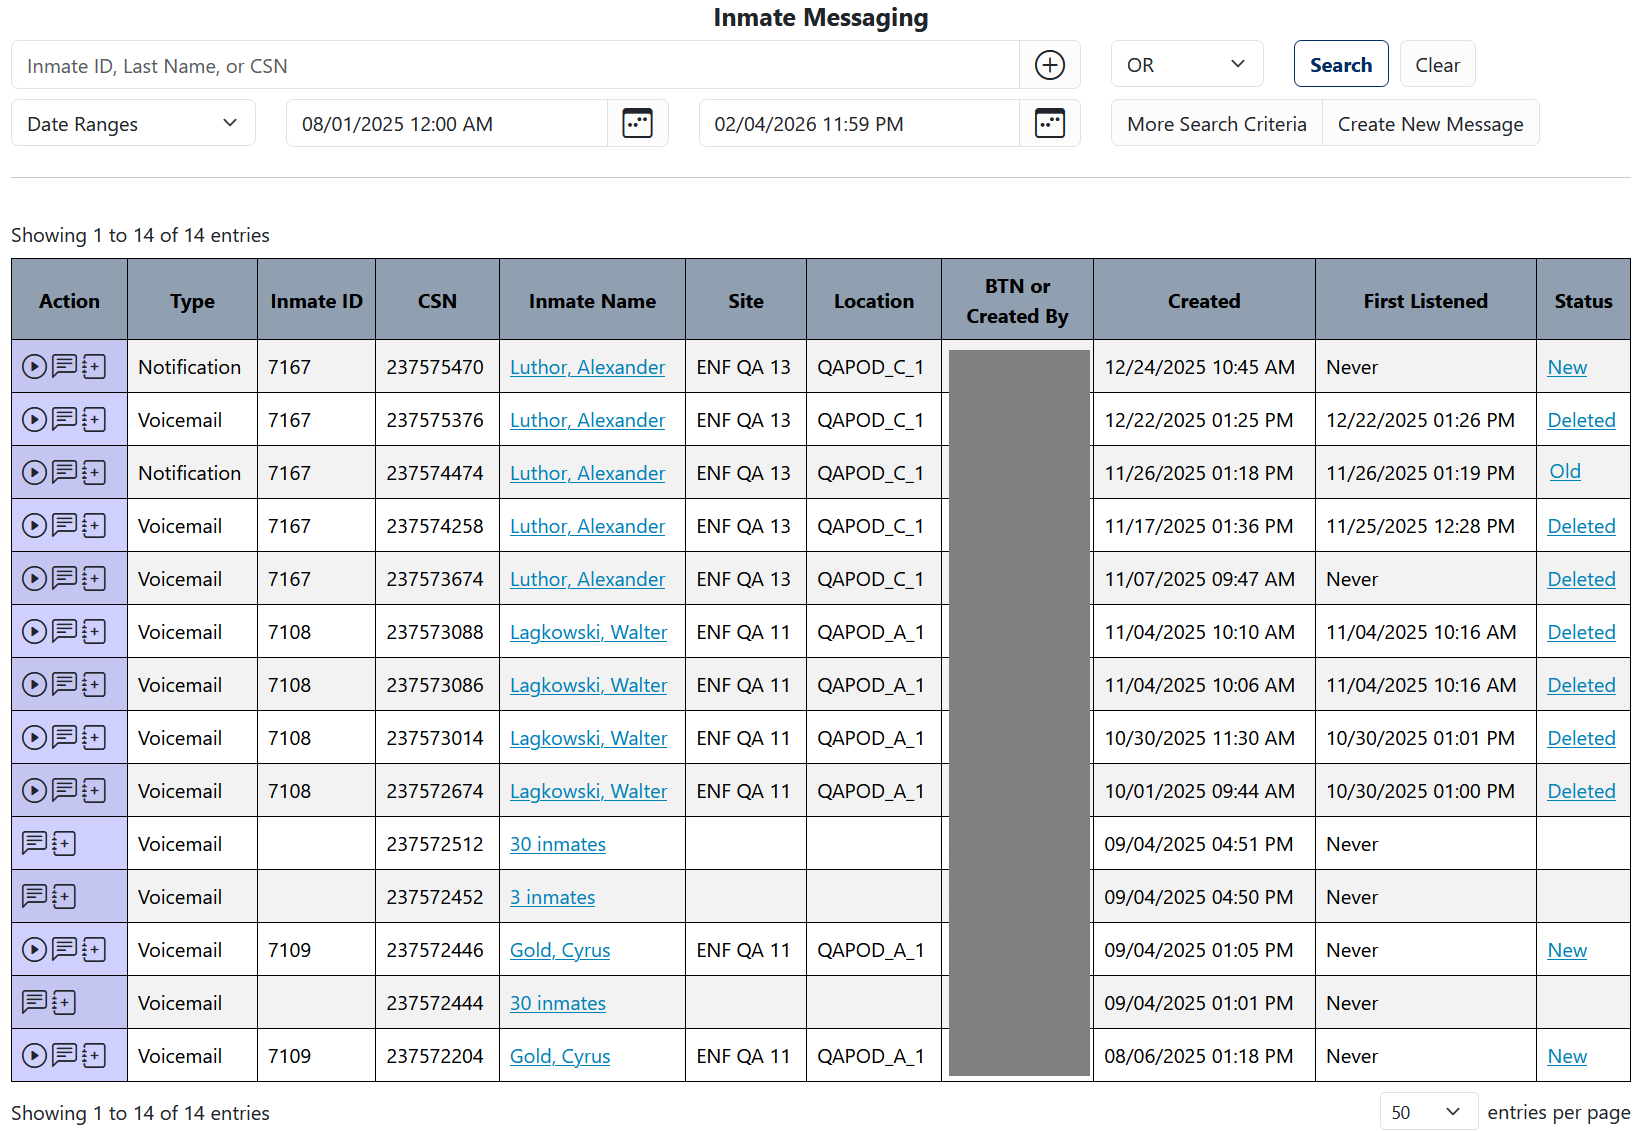
Additionally, a message record is added to the Inmate Messaging℠ list. The ENFORCER® assigns a unique message number for the message, identified by a unique message ID number. If the message was sent to multiple recipients, a separate message record with a unique CSN (call sequence number) is created for each inmate to whom the message is sent.


Inmate Messaging℠ History
When you select the Inmate Messaging menu item, The ENFORCER® displays the Inmate Messaging℠ search page. Additionally, search results for all inmates are shown by default for the most recent month.
Performing an Inmate Messaging℠ Search
The following example shows the main search field on the Inmate Messaging℠ search page, where you can search for an inmate by last name or Inmate ID or for a message record by CSN for the desired message record.

If you do not specify anything in the specific main search field, the search returns all inmate messages created during the default date range.
Searching by Inmate Name
When searching by inmate name, start typing in the inmate’s last name to display a dropdown list. This list displays all inmate names that contain the characters that you enter. In the following example, the dropdown list shows all inmates whose names contain the characters de. Click on the desired name in the list to select it.

You can also type in a last name followed by a comma and one or more additional characters to locate an inmate by last name and first name.

After you select an inmate name or Inmate ID and click Search, The ENFORCER® displays a complete list of all messages sent to the inmate during the specified time range.

Specifying Multiple Criteria
When you specify multiple search criteria in the main search field, you must separate each entry with a comma. Alternatively, enter one search criterion and click ![]() . Each time you click
. Each time you click ![]() , another field is displayed below the previous field where you can enter an additional criterion.
, another field is displayed below the previous field where you can enter an additional criterion.

After you add the search criterion, you must select whether the system searches for either criterion or both criteria, as discussed in the following section.
Searching for Multiple Criteria in the Same Call Record
When you open the Inmate Messaging℠ search page, OR is selected by default on the match type dropdown list, which immediately displays to the right of ![]() . When you perform a search with the default selected, the search results will include all inmate messages that contain either/or any of the search criteria you specify.
. When you perform a search with the default selected, the search results will include all inmate messages that contain either/or any of the search criteria you specify.

You can select the AND option on the match type dropdown list to perform an inmate message search that requests multiple search criteria that must occur in each inmate message returned by the search.

When you select AND from the match type dropdown list, the search results will include inmate message records that contain all specified criteria. In the following example, the Inmate Messaging℠ search returned only one message record that contains both the specified Inmate ID number and the specified CSN.

Searching by Date/Time Range
When you open the Inmate Messaging℠ search page, the date range for the search defaults to the last 30 days up to the current date. For the start date, the time defaults to midnight on that day. For the end date, the time defaults to 11:59 p.m. Depending on your User Settings, the time format used will either be 24-hour time or 12-hour time.
The default date range is configurable by the ICS Administrator and may be set to a time range that is different than the last 30-day default.
You can click ![]() to select a different start or end date from a calendar, or you can manually overwrite a date in the start date or end date field to change it.
to select a different start or end date from a calendar, or you can manually overwrite a date in the start date or end date field to change it.
You can specify a more detailed date range for a search by adding the time of day to the selected start and end dates. You must manually make the time changes in the displayed start and end time fields, as shown in the following example.

Also, a list of frequently used date ranges can be displayed by clicking on the Date Ranges dropdown list.

When you click a date range option on this list, such as Last Week, the start and end dates automatically populate with the date selections. For the start date, the time defaults to midnight on that day. For the end date, the time defaults to 23:59:59. In the following example, the user selected Last Week from the Date Ranges dropdown list.

Available options on the Date Ranges dropdown menu are described below:
- Today - The 24-hour period starting at midnight for the current day.
- Yesterday - The 24-hour period starting at midnight for the previous day.
- This Week - The 7-day period starting at midnight on Monday and running through Sunday for the current week.
- Last Week - The 7-day period starting at midnight on Monday and running through Sunday for the previous week.
- This Month - The entire current month.
- Last Month - The entire previous month.
Adding More Search Criteria
If you want to search for more than one inmate message record, you can add additional search criteria before executing the search. If you click More Search Criteria, a list of additional search criteria is displayed, as shown in the following example.

Each time you click a button in the More Search Criteria dialog box, the criterion you clicked is added to the screen area below the command buttons. In the following example, Message type and Housing location are selected.

In the following example, all five additional search criteria have been selected for an Inmate Messaging℠ search. After selecting and specifying additional search criteria, you can delete any criterion you do not want to use by clicking ![]() .
.

How to use More Search Criteria
The following sections of this article will further explain how to use More Search Criteria.
Message Status
The Message Status criterion is displayed on the Inmate Messaging℠ page by default with no values selected. However, you can click ![]() to display the Message Status selection list. More than one selection may be made.
to display the Message Status selection list. More than one selection may be made.

The available options on this list are described in the following table.
Inmate Message Status Descriptions
| Status | Description |
|---|---|
| New | Inmate has not yet listened to the message. |
| Old | Inmate listened to the message but did not delete it from their voicemailbox. |
| Deleted | Inmate listened to the message and then deleted it from their voicemailbox. |
| Blocked | The caller successfully left the message, but the message was blocked and removed from the inmate’s voicemailbox before the inmate listened to it. |
| Synthesize | The message request has been received, but The ENFORCER® has not converted the message yet. No recording currently exists for the message. |
| Waiting for EOC | Waiting for End of Call. The inmate is currently listening to the message in The ENFORCER® IVR. |
After performing an Inmate Messaging℠ search, you can change the status of any message. For more information, click here.
Message type
The options in the Message Type selection list refer to the origin of the message sent to the inmate. More than one selection may be made.

The available options on this list are described in the following table.
| Status | Description |
|---|---|
| Information | Messages sent to the inmate automatically by The ENFORCER®. |
| Notification | Messages sent to the inmate by an ENFORCER® user. |
| Voicemail | Messages left for the inmate by an outside calling party. |
Message ID
If you know the Message ID for the specific message you wish to search for, enter it in the Message ID.

Sites
If you are searching for a message sent to a specific site, use the Sites selection list to limit your search to that site. You can make more than one selection.

Housing location
If you are searching for a message sent to a specific housing location, use the Housing location selection list to limit your search to that location. You can make more than one selection.

Working with Search Results
The following table describes all columns displayed for Inmate Messaging℠ search results.
Inmate Messaging℠ Search Results – Column Descriptions
| Heading | Description |
|---|---|
| Action • • • | Clickable action icons that display additional detail or enable a task. • Click • Click • Click |
| Type | Message type as described here. |
| Inmate ID | The Inmate ID of the inmate to whom the message was sent. This column will be blank if the message is broadcast to multiple inmates. |
| CSN | Call sequence number of the inmate message record. |
| Inmate Name | Name of the inmate to whom the message was sent. If the message was broadcasted to multiple inmates), this column will be blank. |
| Site | Name of the site where the inmate is housed. This column is displayed for multi-site agencies only. |
| Location | Housing location of the inmate. This optional column is displayed only for agencies that receive a data feed from a Jail Management System (JMS) feed to populate the Location field, which displays in the General Information pane on the Inmate Detail page. For more information, click here. |
| BTN or Created By | The message's source is as follows: • Messages sent to the inmate by an ENFORCER® user show the user name. • Messages sent automatically to the inmate by The ENFORCER® show values such as enf or api_visitor. • Messages left for the inmate by an outside called party show the billed telephone number (BTN). |
| Created | The date and time the message was created. |
| First Listened | The date and time the inmate first listened to the message. If the inmate has not listened to the message yet, Never is displayed in this column. |
| Status | Message status, as described here. For information on changing message status, click here. |
Using Action Icons
This section explains what the icons in the Action column do and how to use them.

Listen to a recorded Inmate Message
From an Inmate Messaging℠ search results page, you can click ![]() in the Action column to open the Web Player to listen to a recorded message.
in the Action column to open the Web Player to listen to a recorded message.

View Inmate Message text
Additionally, you can click ![]() to view the message text, as shown in the following example.
to view the message text, as shown in the following example.

Add a Note to an Inmate Message record
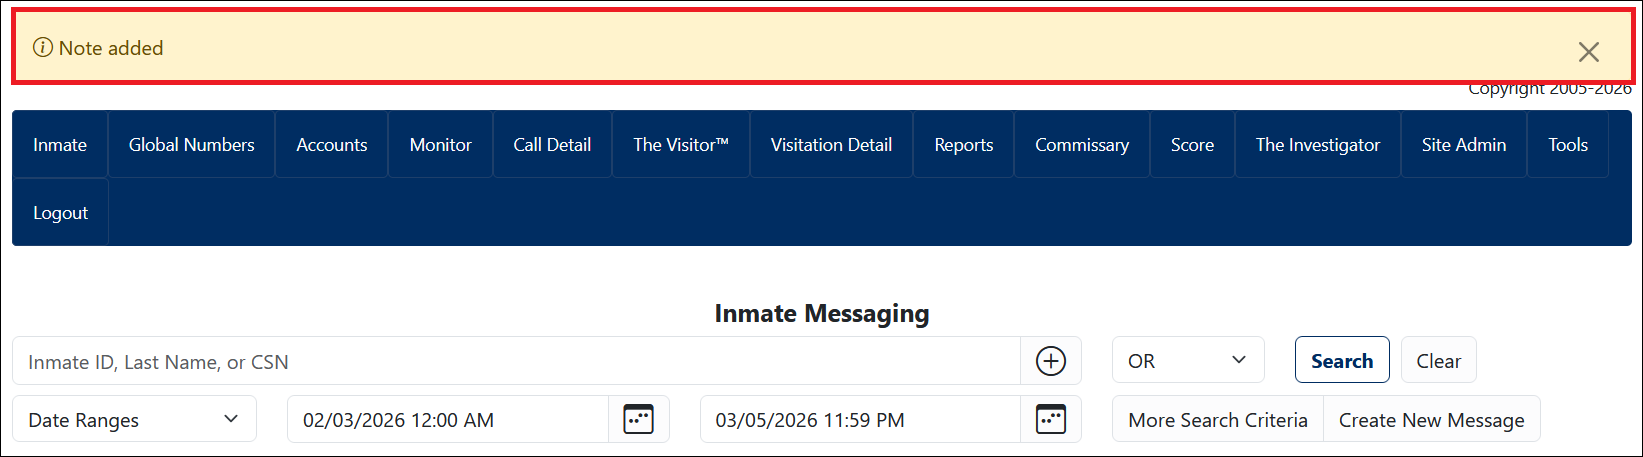
You can also add a note to a selected message by clicking ![]() in the Action column. A Create Note dialog box is then displayed, which includes the CSN for the inmate message record.
in the Action column. A Create Note dialog box is then displayed, which includes the CSN for the inmate message record.
- To add a note, enter the desired text.

- Click Save.

- A confirmation message is displayed at the top of the Inmate Messaging℠ page.


Viewing all Inmate Message records for a broadcast message
On the Inmate Messaging℠ search results page, you can view a list of all inmates to whom a broadcast message was sent. If a message was sent to more than one inmate, the Inmate Name column displays a hyperlink that indicates the number of inmates to whom the message was sent. For example, 110 inmates. Additionally, no value is shown in the Status column since the message was sent to multiple recipients.

After you click this hyperlink, a more detailed list of search results will appear, as shown in the following example.

The example above shows that the Message ID field was automatically populated with the unique Message ID for the broadcast message. The detailed search results list displays a message record for each inmate to whom the message was sent and the unique CSN for each message record. In this list, the Status column provides an indicator of whether the message has been listened to by the specific inmate.
Changing the message status for an Inmate Message
On the Inmate Messaging℠ search results page, you can change the current Status by clicking on the hyperlink in the Status column of a displayed message record.

Select a different status from the dropdown list.

Click Save.

After you change the status of a message, a confirmation message displays at the top of the Inmate Messaging screen.

The displayed line item will now display the changed status, as shown in the following example.

The following list provides some examples of when you may want to and how to change the status for an inmate:
- If an inmate has listened to a message and deleted it, then you want to force the inmate to hear it again. Change the message status from Old to New.
- If a message has been created and sent to the inmate’s voicemailbox but has not yet been listened to by the inmate, and you want to retract the message. Change message status from New to Blocked.
- If a message was blocked before an inmate listened to it, and you want to repost it to the inmate’s voicemailbox. Change status from Blocked to New.