Table of Contents
Prepaid Deposit Search℠
The Prepaid Deposit Search℠ enables authorized users to generate a summary report to show all prepaid funding activity for a specific phone number, for a specific depositor, or for a specific address. You can access the Prepaid Deposit Search℠ by selecting Prepaid Deposit Search under the Accounts tab.
If Prepaid Deposit Search℠ is not used at your agency or facility, Prepaid Deposit Search℠ is not displayed under the Accounts tab.
Performing a Prepaid Deposit Search℠
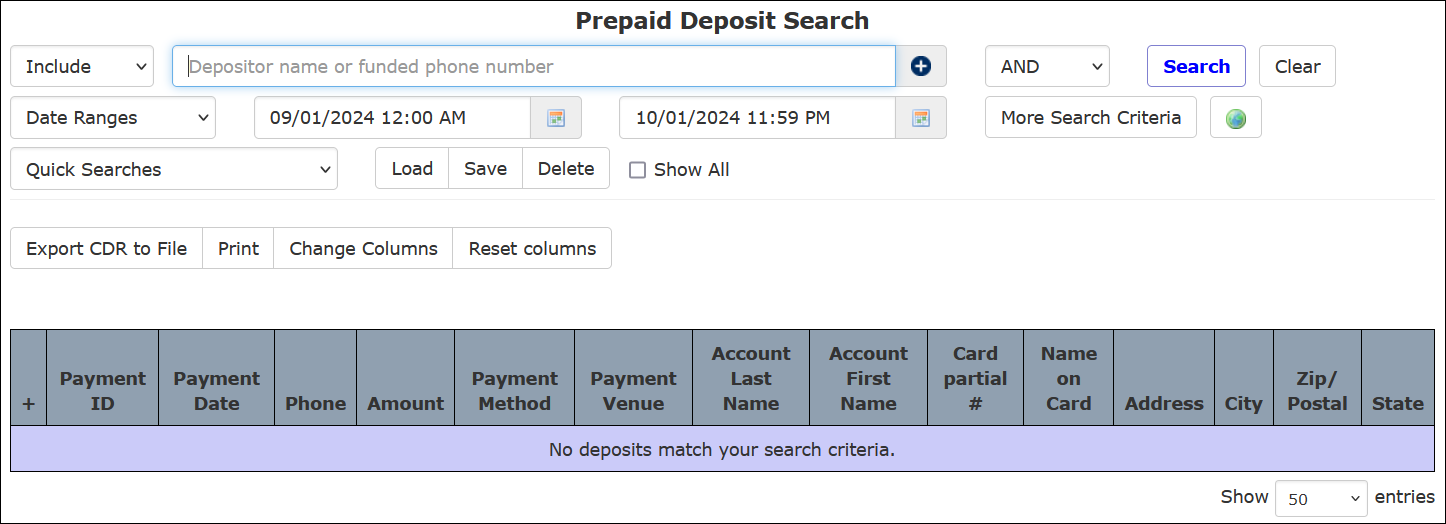
When you select Prepaid Deposit Search℠, a search dialog displays where you can enter specific criteria in the Depositor name or funded phone number search field to view prepaid funding activity. These criteria include the following:
- A specific Depositor name. For example, the Last name on a credit/debit card or the name on a card used for credit card payments.
- A specific Phone Number that has been funded.
- A specific date range. The default range is set to the previous week through the current date.
The following example shows the Prepaid Deposit Search℠ page with the main search field in the red box.
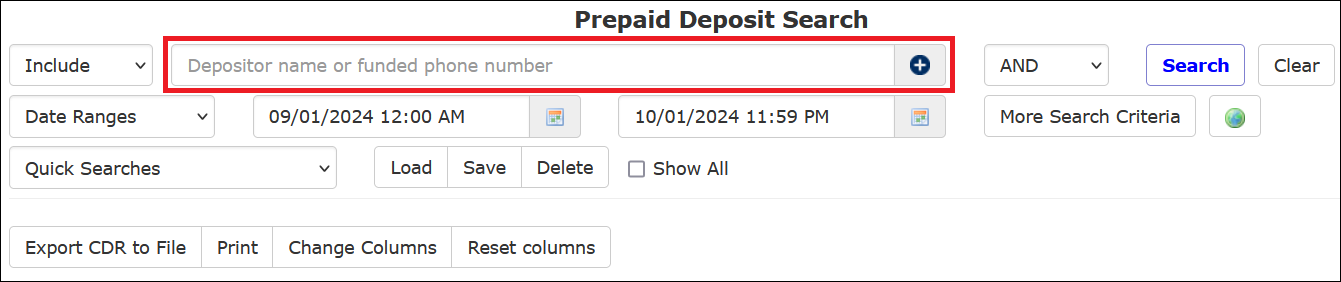
If you do not specify search criteria in the main search field, the search returns all records from the default date range. You can use an asterisk (*) to perform a search if you have only partial information to search for. For example, if you know the telephone number begins with 2104 but do not know the last six digits, you could enter 2104* into the search field. Any records for phone numbers beginning with 2104 will be returned in the results.
Searching by Account Holder Address
You can use a two-step process to search for prepaid funding activity associated with an address for a Prepaid Collect account holder:
- Click
 to open the address search dialog box to enter all or part of the address manually.
 - Click Use this address to apply the information you entered in the address box to the search. If the information you pasted is incorrect and you want to start over, click Cancel.
In the following example, the user has specified multiple address criteria. The search results returned all prepaid deposits that contained any of the address items specified by the user, including the street name Main, the city Gotham, the state NJ, and the zip code 00000.

Specifying Multiple Criteria
When you specify multiple search criteria in the search field, separate each entry with a comma. Alternatively, enter one search criterion and click ![]() . Each time you click
. Each time you click ![]() , another field is displayed where you can enter an additional criterion.
, another field is displayed where you can enter an additional criterion.

When you perform a search for multiple criteria and leave the default as AND, only the results with both specified criteria will be displayed. If you change the specification to OR, the search results will include every record that contains either of your specified criteria.
Searching by Date/Time Range
The default date range for Prepaid Deposit Search includes the previous seven days up to the current date. The default time for the start date is midnight of that day, or 00:00:00. The default time for the end date is 23:59:59.
The default date range may be configured by an ICS Administrator and may be set to a date range that is different than the last seven days.
You can specify a more detailed date range for a search by adding the time of day to the selected start and end dates. You must make the time changes manually in the start date and end date fields shown in the following example.

Additionally, you may click Date Ranges to display a dropdown list of frequently used date ranges. When you click a date range option from the dropdown list, the start date and end date automatically populate with your selection. The default time for the start date is midnight of that day, or 00:00:00. The default time for the end date is 23:59:59.
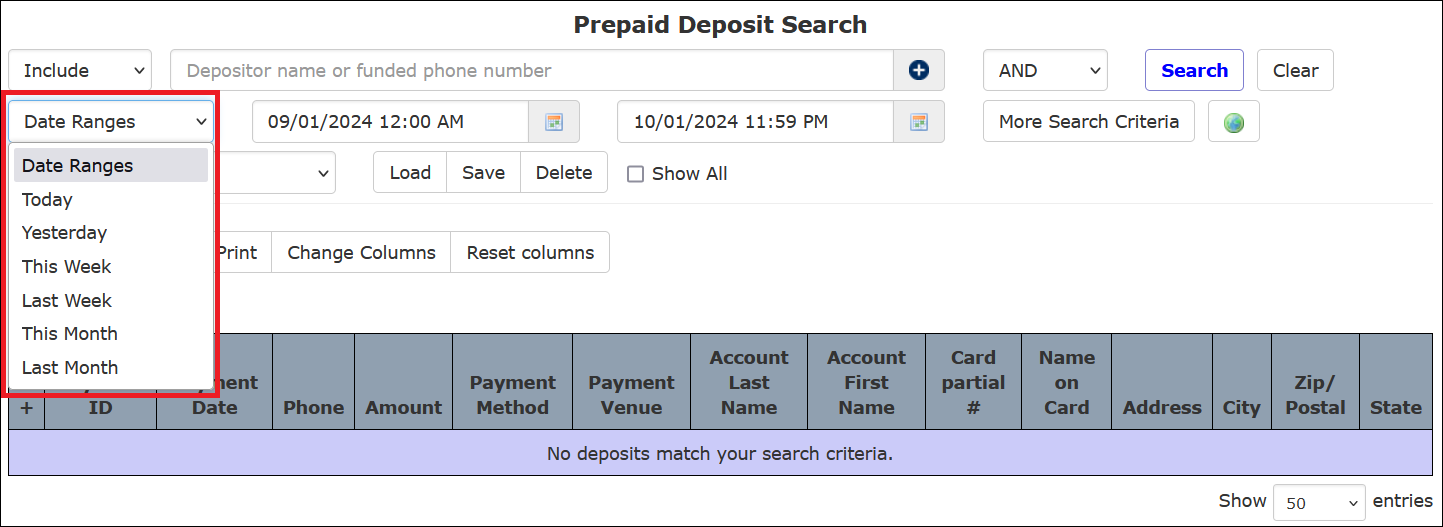
The option for This Week refers to the week containing the current date starting on Monday and ending on Sunday.
Limiting Search Criteria
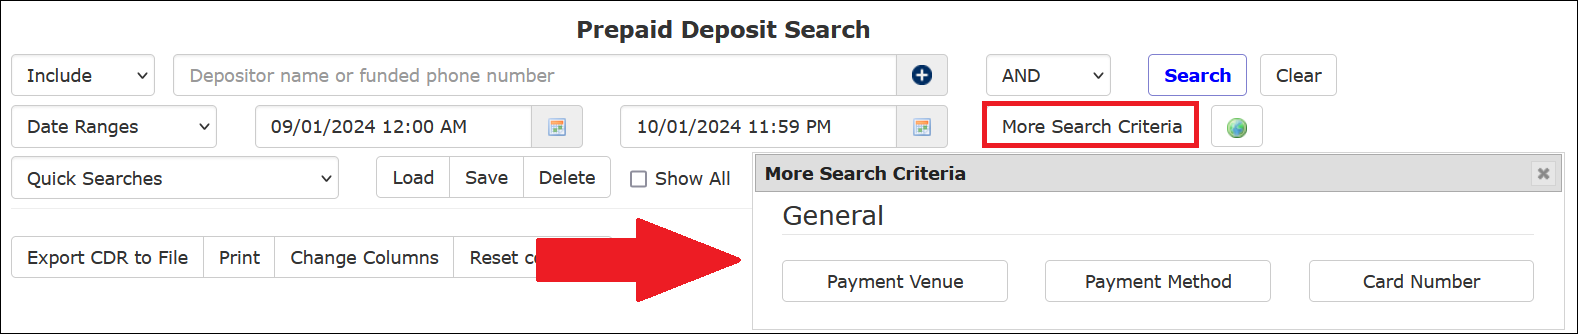
You can limit your search further by clicking More Search Criteria, which opens a dialog box where you can specify additional search parameters relating to prepaid account funding activity. These options enable you to specify any of the following:
- Payment Venue – A specific payment venue. For example, www.icsolutions.com, IVR, live agent, etc.
- Payment Method – A specific payment method. Such as a credit/debit card, Western Union, Money Order, etc.
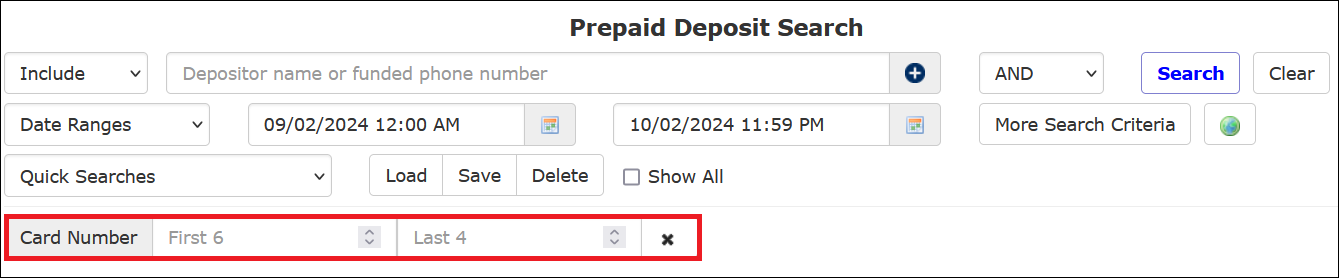
- Card Number – A specific credit card number. This can be the first six digits of the card, the last four digits of the card, or both.
After you click More Search Criteria, a dialog box is displayed that lets you select and specify additional search parameters for these criteria.
Each time you click on an additional criterion in the More Search Criteria dialog box, the criterion is displayed on the page, and the More Search Criteria dialog box closes. The newly displayed criterion lets you define the value to refine your search.
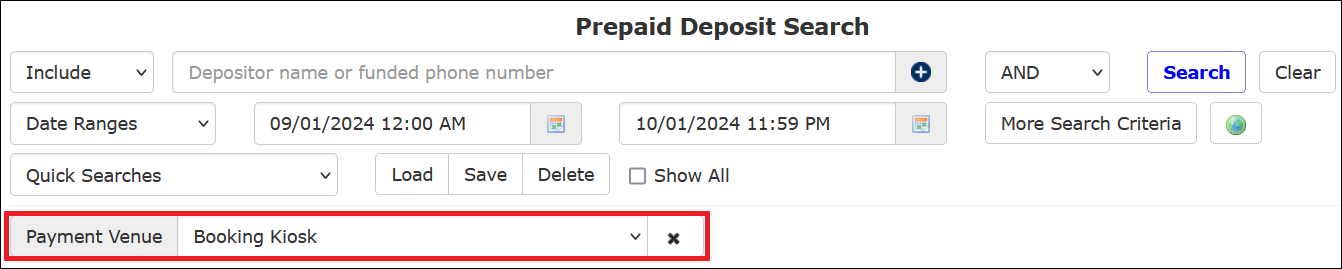
In the following example, the user selected Payment Venue. Afterward, the More Search Criteria dialog box closed, and the search item was added to the page to enable the selection of a payment venue.
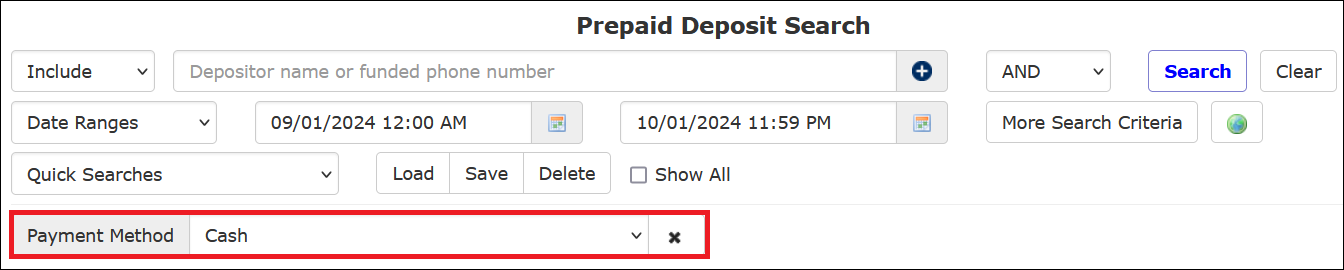
In the following example, the user selected Payment Method. Afterward, the More Search Criteria dialog box closed, and the search item was added to the page to enable the selection of a payment method.
In the following example, the user selected Card Number. Afterward, the More Search Criteria dialog box closed, and the search item was added to the page to enable the user to search by the last four digits of the credit/debit card number associated with any prepaid deposits made during the date range selected.
In the following example, the user selected all three additional search criteria. As a result, three search items are displayed, and you can make one selection from a dropdown list or enter a portion of a credit card number. If you select any additional criteria and decide not to use it, click ![]() .
.

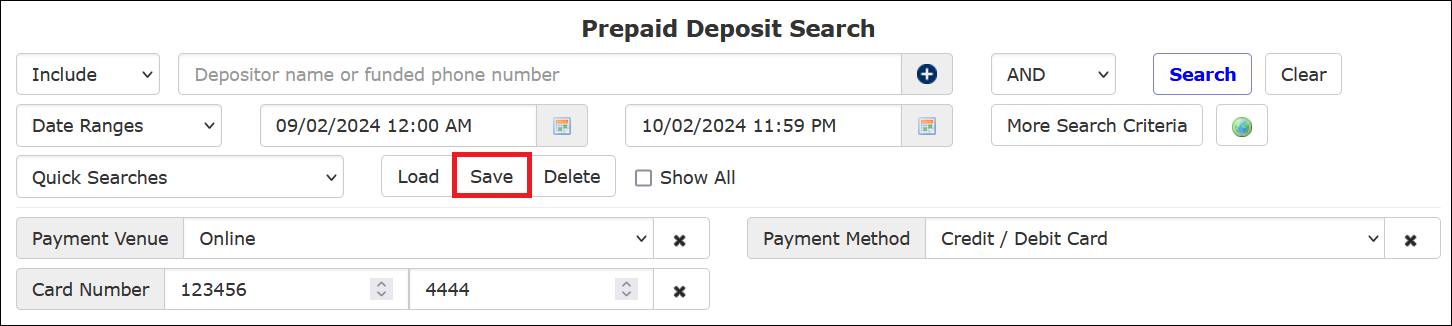
Saving Search Criteria for a Future Search
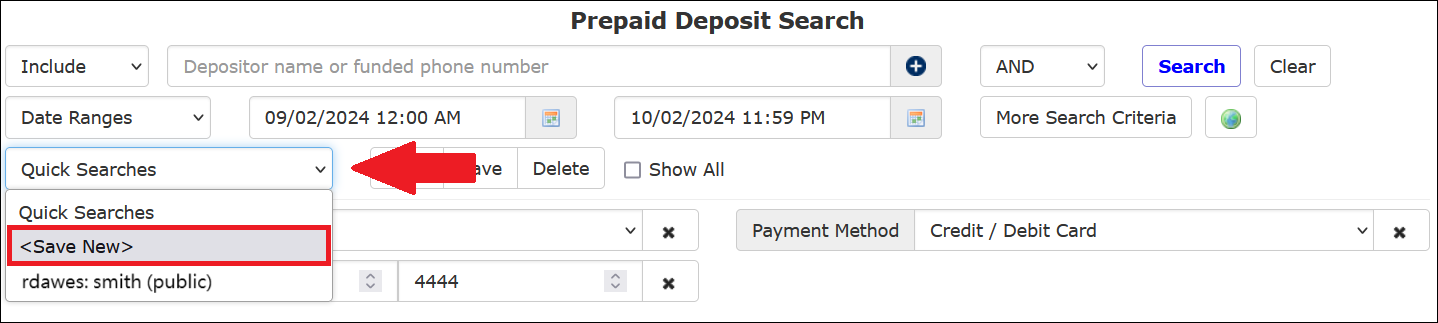
After you have set up a specific set of search criteria for a Prepaid Deposit Search℠, you can save the criteria for a future Quick Search by clicking Save.
Alternatively, you can select <Save New> from the dropdown list under Quick Searches.
After you use either method shown above to begin saving a search, The ENFORCER® displays the Save This Search dialog box, which includes the details about your search in the Details pane, as shown in the following example.

In the following example, the user named the search, selected it for use by other users, and clicked Save.

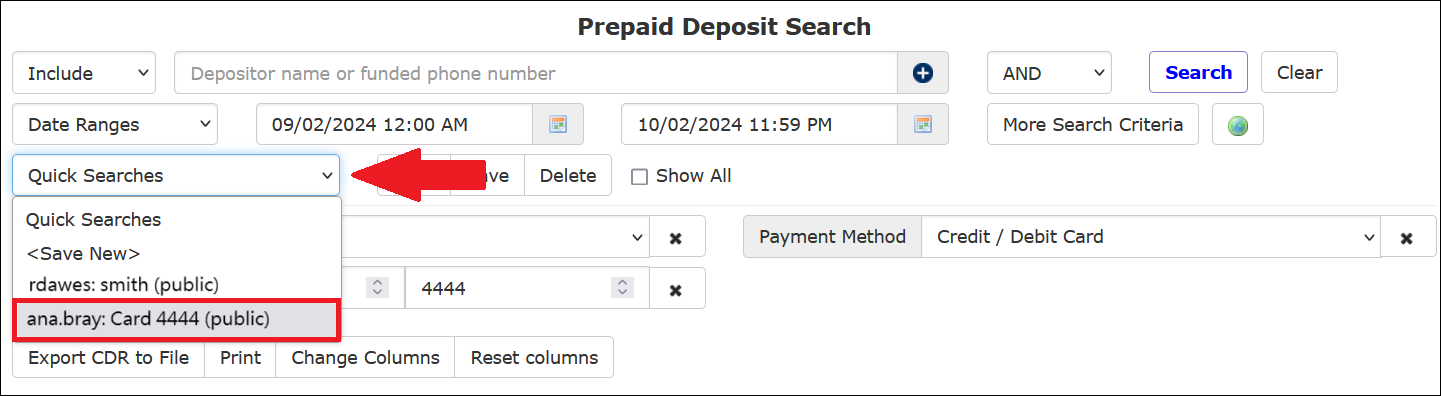
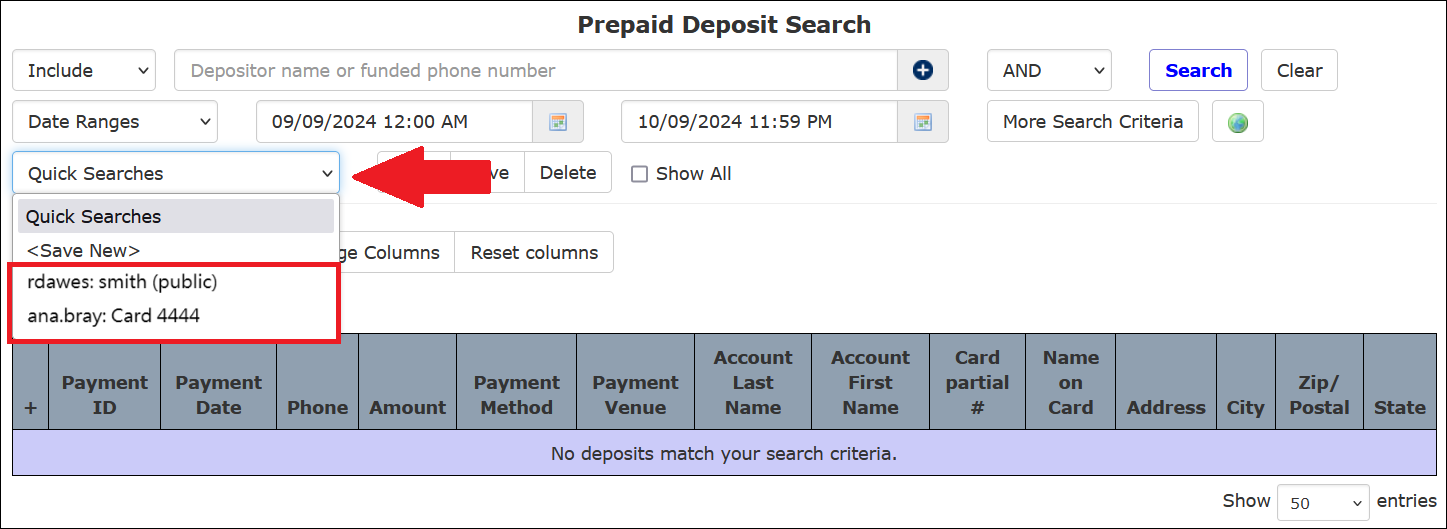
After a search has been saved, it will now be accessible from the Quick Searches dropdown list as shown in the following example. The search name is preceded by The ENFORCER® user ID of the person who created it. The word (public) is also displayed if the search was made available to other users.
When you return later and perform a Prepaid Deposit Search℠ by selecting saved criteria and clicking Load, the search is loaded for the same date range you saved from the original search. To search for a different date range, you must specify a new start date/time and end date/time before you click Search.
How to save a Prepaid Deposit Search
- Perform a Prepaid Deposit Search℠ based on desired criteria.
- Click <Save New> in the Quick Searches dropdown list, or click Save.
- In the Save This Search dialog box, enter a meaningful name for the saved criteria in the Name field. Be sure to include any information, such as an account holder’s name or phone number, which may help to clearly identify the saved criteria to other ENFORCER® users.
- To make the search criteria available to other ENFORCER® users, select the Make this search public checkbox.
- In the Save This Search dialog box, click Save. The new search name is added to the Quick Searches dropdown list and is preceded by the user ID of the person who created it. If you have clicked the Make this search public checkbox, the search name will be displayed to other users. If you do not click this checkbox, it will be displayed to you only.
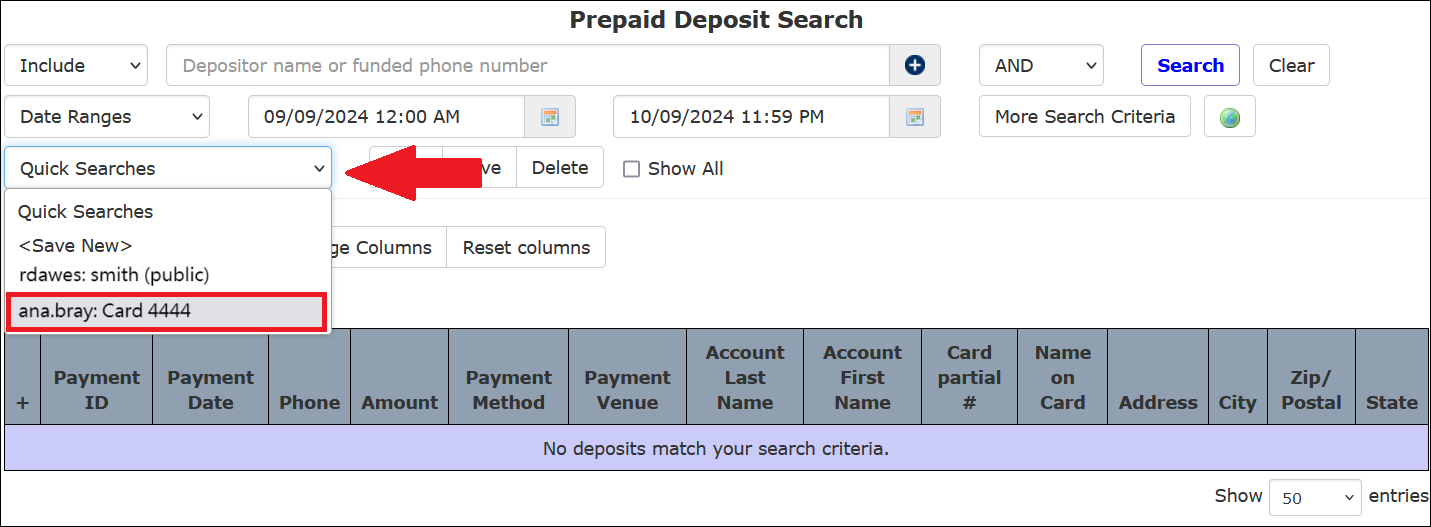
The following example shows a Quick Searches dropdown list of all saved searches. For one of the saved searches shown in this list, the user named rdawes selected the Make this search public checkbox when the search was created for the account holder's last name Smith. However, the user ana.bray did not elect to make the search for the Debit or Credit Card number ending in 4444 public. The saved search for the Debit or Credit Card number cannot be viewed by users other than ana.bray.
How to use a saved Prepaid Deposit Search℠
- Click Prepaid Deposit Search℠ under the Accounts tab.
- Select the desired search name from the Quick Searches dropdown list.
- Click Load to load the search criteria for the selected search name.
When you select a saved search and click Load, the search is loaded for the same date range that you saved from the original search. To search for a different date range, you must specify a new start date/time and end date/time before you click Search.
- Click Search. The ENFORCER® displays the search results.
How to edit and save an existing Prepaid Deposit Search℠
- Click Prepaid Deposit Search℠ under the Call Detail tab.
- Select the desired search name from the Quick Searches dropdown list.
- Click Load.

- Add or edit any desired search criteria on the Prepaid Deposit Search℠ page.
- Click Save. The Update Saved Search dialog box is displayed and lists any added or changed search criteria, as shown in the following example.
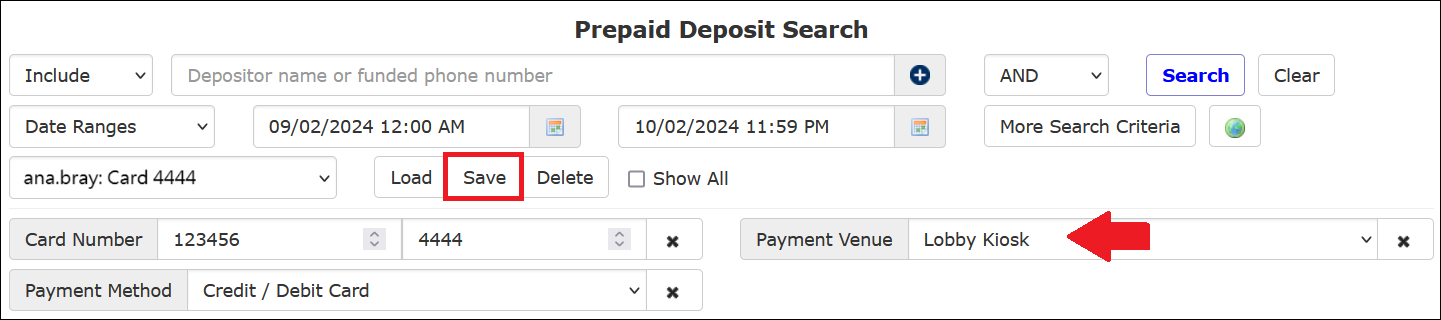
- Select the Confirm: Replace existing search checkbox. Optionally, you can change whether other users can use the search by selecting or deselecting the Make this search public checkbox. Then click Save.

The search is saved under the same search name but with the modified criteria.
Working with Search Results
After you select all desired search parameters and perform a Prepaid Deposit Search℠, the search results are displayed, as shown in the following example.
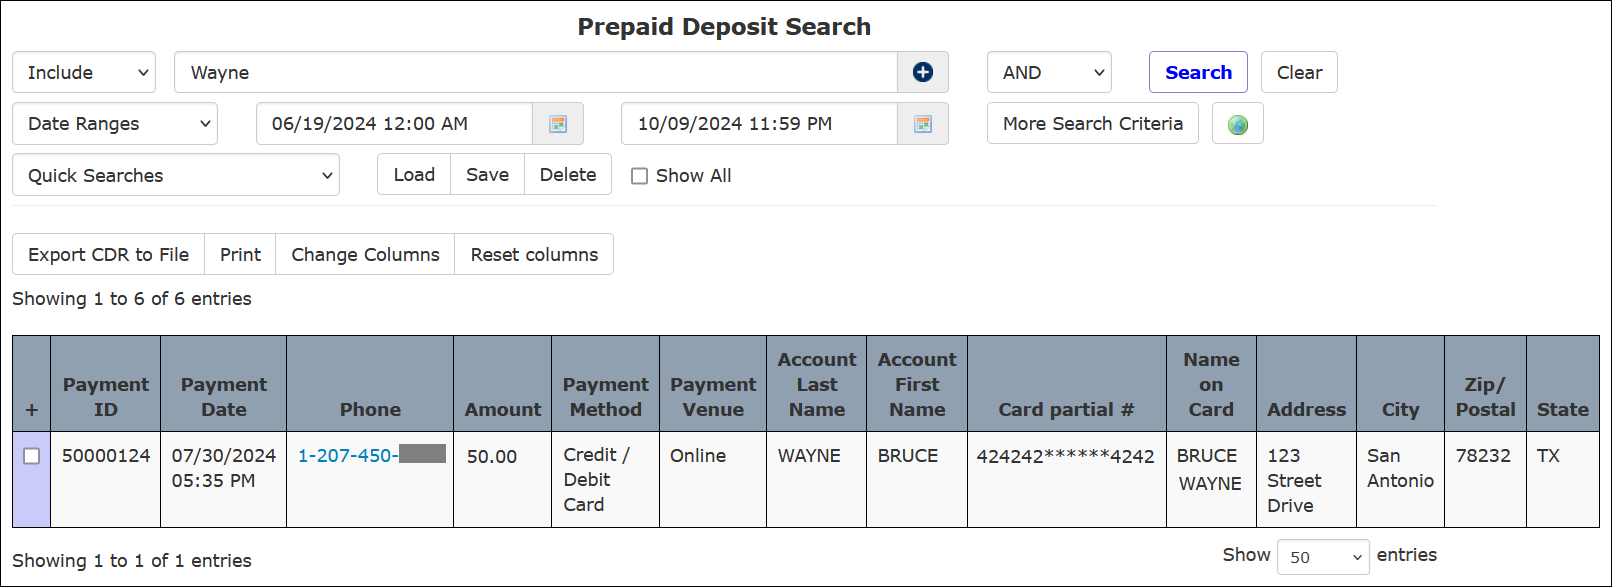
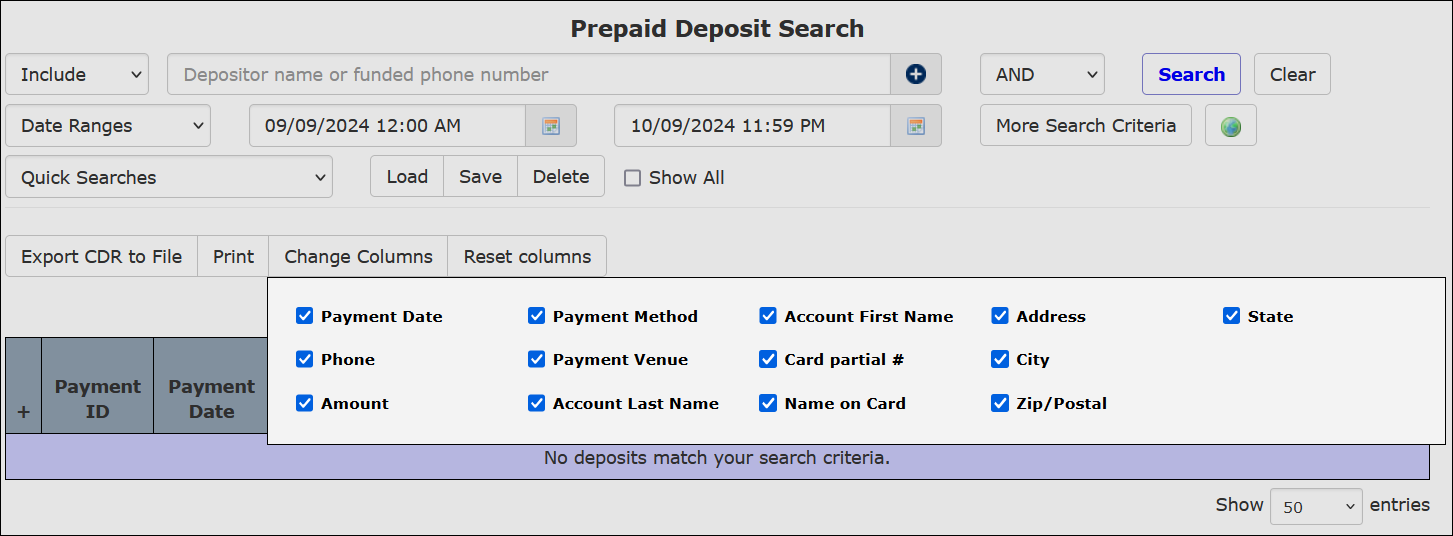
Displayed column headings are described below:
- Payment ID: Payment ID number
- Payment Date: Date and time the transaction took place
- Phone: Phone number associated with the account. This is a clickable hyperlink that will open the Prepaid Collect page for the account holder.
- Amount: Dollar amount of the transaction.
- Payment Method: Payment method used for the transaction. For example, a credit/debit card, Western Union, and Money Order, etc.
- Payment Venue: Venue through which the transaction took place. For example, a live agent, IVR, online through www.icsolutions.com, etc.
- Account Last Name: Last name associated with the account.
- Account First Name: First name associated with the account.
- Card Partial #: If a credit/debit card was used as the payment method, the first six digits of the card number, the last four digits of the card number, or both will be displayed.
- Name on Card: If a credit/debit card was used as the payment method, the name that appears on the card will be displayed.
- Address: The street address associated with the Prepaid Collect account. If a credit card was used as the payment method, the billing street address will be displayed.
- City: The city associated with the Prepaid Collect account. If a credit card was used as the payment method, the billing city will be displayed.
- Zip/Postal: The zip or postal code associated with the Prepaid Collect account. If a credit card was used as the payment method, the billing zip or postal code will be displayed.
- State: The state associated with the Prepaid Collect account. If a credit card was used as the payment method, the billing state will be displayed.
Payment information, such as the Payment ID as well as the Payment date and time, are generated by The ENFORCER®. The date and time are always displayed in Central Standard Time (CST). Depending on the geographic location of the facility, this information may not directly match records in the facility’s database when money was credited to a Prepaid Collect account.
By default, the information listed above is displayed in the results table. You may limit the information in the displayed results by clicking Change Columns. When you do so, a dialog box opens that lists each column heading with a checkbox. By default, each column heading checkbox is selected. To limit the information displayed in the search results, deselect any column heading you want to remove from your results. This setting will be saved each time you run this report until you modify or reinstate the default columns by clicking Reset Columns.